Saturday 26 February 2011

Create A Screen Lock Shortcut


In case you don’t like shortkeys or you keep forgetting them, there’s another option for screen lock.
Simply create a new shortcut to C:\Windows\System32\rundll32.exe user32.dll, LockWorkStation and place it wherever you want.

Enable Run Command In Start Menu


If you miss the old Run Command button in XP, then there’s an option to get it back in Windows 7.
Right-click an open area in Start Menu, go to Properties -> Start Menu -> Customize and check “Run Command”. Now you should be done.

Change Default Save Location For Files


Windows 7 is a bit different from Vista, because it saves Documents, Pictures, Videos and Music under the Public folder inside C:\Users. You might not want to save your documents, pictures, videos or music to this location, but create your own locations and you can do it quite easy.
Press the Windows Key, click your username and double-click on the folder you wish to change. Then you will see Includes: 2 library locations. Click on that text, right-click on the folder you wish to set like default and click “Set as default file location”, then click Ok.

Just Don’t Use Windows Vista


Yes, this is very useful tip and it is strongly recommended. In fact, I should have put this one on the top of the list, so you better apply it… for your own good.
If you like this post, Subscribe To RSS Feed and get the latest posts whenever they’re available. Thanks!
[tags]windows 7, tips and tricks, features, top list, useful tips, guide, how to, vista, microsoft, internet explorer, windows media center[/tags]

Cycle Through The Open Programs Via The Taskbar’s Peek Menu

This works just like Alt + Tab, but opens the menu just above the sidebar, doesn’t seem very useful. Give it a try by pressing The Windows Key + T

Turn Off Security Messages

To turn off security messages you have to go to Control Panel -> System and Security -> Action Center -> Change Action Center Settings and you can turn off the following notifications: Windows Update, Internet Security Settings, Network Firewall, Spyware and related protection, User Account Control, Virus Protection, Windows Backup, Windows Troubleshooting, Check for updates.

Turn Off System Notifications


System notifications are usually disturbing and aren’t always useful, so you might want to turn some of them off and.
This can be done in Windows 7 by double clicking the Notification Area Icons in Control panel. There you can change notifications and icons for the Action Center, Network, Volume, Windows Explorer, Media Center Tray Applet, Windows Update Automatic Updates.

Preview Photos In Windows Explorer

While in Windows Explorer, Press ALT + P and a preview should appear on the right.

Activate The Quick Launch Toolbar

The Quick Launch Toolbar in Windows XP and in Vista seems a very good idea that you might miss when using Windows 7. Fortunately though, you can get it back in a quick few steps.
Right click the taskbar, go to Toolbar -> New Toolbar and type “%UserProfile%\AppData\Roaming\Microsoft\Internet Explorer\Quick Launch” into the folder box, then click Select Folder.
To make it look like it would in Windows Vista, right click the taskbar, uncheck “Lock the Taskbar”, then right click the divider and uncheck “Show Title” and “Show Text”. Then right click the taskbar and check “Show Small Icons” and you should be done.

Minimize The Active Window

Press Windows Key + Down Key

Maximize Or Restore The Foreground Window

Press Windows Key + Up Key.

Multi-threaded File Copy

If you are a more advanced user, you’ve heard already about Robocopy. Now it’s included in Windows 7 and lets you perform multi-threaded copies from the command line. You can choose the number of threads like this “/MT[:n], which can be from 1 to 128.

Combine Taskbar Icons

When you have more windows or applications opened, the taskbar’s space might not be enough for them all, so you need to combine them, just like you would in Windows XP or Vista. To do this, right-click the Start button, then go to Properties -> Taskbar and check “Combine when taskbar is full”.

Make The Taskbar Smaller

If you feel like the taskbar is using too much of your screen space, you can choose to make the icons smaller. To do this, right-click on the Start button, then go toProperties -> Taskbar and set it to “Use small icons

Background Photo Slideshow


If you are like me, lazy and bored, then you will want to change the background from time to time, wasting a lot of time. Now you don’t have to do this anymore, because you can set up a slideshow.
Right click on the desktop then go to Personalize -> Desktop Background and hold the CTRL key while choosing the images. Then you can choose the time intervals between images and opt to display them randomly or in a row.

Display Gadgets On Top Of Other Windows

Press ALT + G

Screen Calibration

Fortunately, Windows 7 comes with a display calibration wizard that lets you set up the screen brightness properly, so you won’t have any problems viewing photos or text. The problem was that on one PC a photo could look sharp and bright and on another it looks awful. Now the problem can be fixed by pressing the Windows logo key and then typing “DCCW”.

PC Safeguard


I rarely let anyone use my PC because I’m afraid he will mess it up, but it seems Microsoft has been thinking at me and came with a solution. The PC Safeguard doesn’t let anyone mess your PC settings, because after the user logs off, the configurations are reset back to normal. Of course it will not restore the configurations changed by you, but only the ones done by other users you define.
To use PC Safeguard, go to Control Panel -> User Accounts and create a new account, then select “Set Up Pc Safeguard” and switch it on. Then you can stay relaxed when others use your computer, because you won’t find anything changed, including configurations, downloaded software, installed programs.

Friday 25 February 2011

forgot the password when you first install the Windows 7


So what if you forgot the password when you first install the Windows 7 ?

No worries, you can still retrieve the password by going to
Control Panel > Network and Internet > HomeGroup
homegroup_setting
On the bottom of the section, you will see “View or print the homegroup password” also if the default generated password aren’t easy to remember you can also change the password to your own.
view_password
If you wish you change the password just click “Change the password …”
You will be asked and prompt to change the password
change_password
Click “Change the password”
you_can_type_your_own_password
Here you can either type your own password or re-generate a system generated password.
Lastly, remember in order to make HomeGroup to work you need at least two or more computers that are connected in the same network. Once you got the password, type the password in another computer and you will see a listed users that are currently in your HomeGroup. Depending on the settings you set to share which folder you can now easily access files between others.
homegroupEnjoy.

Zoom in/out the Window


Picture of Windows logo key Windows Key + plus (+ sign)
Picture of Windows logo key Windows Key + minus (- sign)

To Snap, Aero Shake


Picture of Windows logo key Windows Key + Up/Down/Left/Right Arrows
Picture of Windows logo key Windows Key + Home to Aero Shake
Picture of Windows logo key Windows Key + Shift + Up/Left/Right Arrows to stretch the window

To open the Run dialog box


Picture of Windows logo key Windows Key + R
image

To quickly lock the desktop


It’s extremely useful when you are in hurry leaving your computer.
Picture of Windows logo key Windows Key + L

To quickly open Windows application


Picture of Windows logo key Windows Key + E to open Windows Explorer
Picture of Windows logo key Windows Key + P to open external display window

To display the desktop


Picture of Windows logo key Windows Key + D or
Picture of Windows logo key Windows Key + M (minimize all windows) or
Picture of Windows logo key Windows Key + Space (to peek the desktop)

2. To cycle through the applications

Picture of Windows logo key Windows Key + Tab or
Picture of Windows logo key Windows Key + Ctrl + Tab (lock the cycle through window)
Picture of Windows logo key Windows Key + Shift + Tab (cycle through in backwards)

Get Exact Colors On Your Screen

If you are an artist or you work with colors, use the Calibrate Color option in the Control Panel Display applet or run dccw.exe from the Start Menu search box. You can adjust gamma, brightness, contrast, and color balance, ensuring that colors are displayed correctly on your screen.

Adjust Screen Text with Clear Type


Use Clear Type Tuner for the best look on your LCD monitor or laptop screen. Run ‘cttune.exe’ from the Start Menu search box, or go to the Control Panel Display applet, and select Adjust ClearType Text from the left.
ClearType Tuner

View Expanded ‘Send To’ Menu

Press Shift when right-clicking on a folder to get an expanded Send To menu.

Open Command Prompt in Any Folder

Like the command prompt? Miss the ‘Open Command Window Here’ Windows XP power toy? Press ‘Shift’ when right-clicking on a folder to get that option in the context menu. This also works on the desktop. No power toy required!
ExpandedContextMenu

Create Keyboard Shortcuts for Programs


You can create keyboard shortcuts for any program in Windows 7. Right-click the program icon and select Properties. Select the Shortcut tab, click in Shortcut key, to set the keyboard shortcut for that program.
ProgramShortcutKey

Rearrange System Tray Icons


SystemTray
You can rearrange icons on the taskbar as you wish and start new (or switch to running) instances of the first ten taskbar programs using Win+1Win+2, and so on. The cool thing is you can also rearrange system tray icons. Reorder them on the tray or move them outside or back in the tray. Take control of what you want to always keep an eye on, and from which apps you’ll require notifications.

Use Keyboard Shortcuts


Using the mouse, you can drag-‘n-dock windows to either side of the screen, or drag it to the top to maximize it. These keyboard shortcuts are even faster:
  • Win+Left Arrow and Win+Right Arrow dock the window to the left and right side of the screen
  • Win+Up Arrow and Win+Down Arrow maximize and restore/minimize
  • Win+M minimizes everything
  • Alt+UpAlt+Left ArrowAlt+Right Arrow navigate to parent folder, or browse Back and Forward through folders in Explorer
  • Win+Home minimizes/restores all open windows except the active window
  • Alt+Win+# accesses the Jump List of program number ‘#’ on the taskbar

Rearrange Taskbar Icons

It's easy to rearrange the icons across the bottom of the screen -- simply drag an icon to where you want it to live. You can also add icons to the taskbar by dragging them from an application, and delete the icons by highlighting them and pressing the Delete key.

Speed Up the Display of Thumbnails on the Taskbar


One of the nicest things about the taskbar is that when you hover your mouse over the icons in it, you can see thumbnail previews of all open windows for each of those applications. When you do so, there is a slight delay before the thumbnail appears. But you can make the thumbnails display more quickly by using a Registry hack.
Important: Always create a Restore Point before editing the Windows Registry. If you don't know how to create a Restore Point or find your way around the Windows Registry, see "The tweaker's guide to the Windows Registry."
The taskbar in thumbnail view.

1. Launch the Registry Editor by typing 
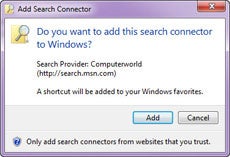
regedit in the Search box and pressing Enter.
2. Go to HKEY_CURRENT_USER\Control Panel\Mouse.
3. Double-click MouseHoverTime. The default value you'll see is 400 -- which means 400 milliseconds. Type in a new, smaller value -- 150 is a good bet. Then click OK and exit the Registry Editor. You'll have to log off or restart your computer for the change to take effect.

Taskbar Tips

One of the most significant changes to the Windows 7 interface is its new taskbar, which acts more like the Mac OS X dock than the Windows taskbar of old. Here are a few quick tips for using the new taskbar and tweaks for taking charge of it.

Build Your Own Internet Search Connector


Windows 7 has a very useful new feature called a Search Connector that lets you search through a Web site from right inside Windows Explorer. With it, you type in a search term and select the Search Connector for the site you want to search; Explorer searches the Web site without having to open Internet Explorer, and the results appear inside Windows Explorer. Click any of the results to head there using your default Web browser.
Normally, you'll need to get each Search Connector from the Web site through which you want to search, and very few Connectors are available. Sites normally need to adhere to OpenSearchstandards in order for their Connectors to work.
However, there's a work-around that will let you easily build your own Search Connector for any site, using Windows Live Search as a kind of go-between. Don't worry, you don't need to know any code to write a Connector. Just follow these steps:
1. Copy the following text and paste it into Notepad. The text you'll need to change is in bold, all-caps text:
<?xml version="1.0" encoding="UTF-8"?>
<OpenSearchDescription xmlns="http://a9.com/-/spec/opensearch/1.1/" xmlns:ms-ose="http://schemas.microsoft.com/opensearchext/2009/">
<ShortName>NAME YOUR SEARCH</ShortName>
<Description>DESCRIPTION OF SEARCH</Description>
<Url type="application/rss+xml" template="http://api.bing.com/rss.aspx?source=web&query={searchTerms} site:SITENAME.COM&web.count=50"/>
<Url type="text/html" template="http://www.bing.com/search?q={searchTerms}+site:SITENAME.COM"/>
</OpenSearchDescription>
Adding a new Search Connector.
2. In place of NAME YOUR SEARCH, type in the name of the search as you want it to appear. In our case, we're going to build a Search Connector for Computerworld, so we'll just type inComputerworld.
3. In place of DESCRIPTION OF SEARCH, type in a longer description of the search. In our instance, it will be Search through Computerworld.
4. In the two SITENAME.COM entries, enter the Web site's domain. Don't use the http:// or www -- just the domain name. In our instance it will be computerworld.com.
5. To the right of "count=", type in the number or results you want to appear. In our instance, we'll keep it at 50.
6. In our example, here's what the code should look like (no bold necessary):
<?xml version="1.0" encoding="UTF-8"?>
<OpenSearchDescription xmlns="http://a9.com/-/spec/opensearch/1.1/" xmlns:ms-ose="http://schemas.microsoft.com/opensearchext/2009/">
<ShortName>Computerworld</ShortName>
<Description>Search through Computerworld</Description>
<Url type="application/rss+xml" template="http://api.bing.com/rss.aspx?source=web&query={searchTerms} site:computerworld.com&web.count=50"/>
<Url type="text/html" template="http://www.bing.com/search?q={searchTerms}+site:computerworld.com"/>
</OpenSearchDescription>
7. Save the file in Notepad, choose UTF-8 from the Encoding drop-down box near the bottom of the Save As screen, and give it an .osdx extension. In our instance, we'll call the file Computerworld.osdx.
8. In Windows Explorer, right-click the .osdx file and select Create Search Connector. The Search Connector will be created.
9. You can now use the Search Connector. To get to it, in Windows Explorer go to YourName --> Searches --> Connector, where YourName is your account name, andConnector is the name of the Connector.

Show all Your Drives in Windows Explorer


Depending on your system settings, when you go to Computer in Windows Explorer, you may be in for a shock -- you may not see all your drives such as memory card readers if those drives are empty. If this disconcerts you, there's a simple way for you to see them even if there's nothing there:
1. Launch Windows Explorer and press the Alt button to reveal the top menu.
2. Select Tools --> Folder Options and click the View tab.
3. Under "Advanced settings," uncheck the box next to "Hide empty drives in the Computer folder." Click OK. The drives will now always be visible.

Set a New Windows Explorer Launch Folder


When you run Windows Explorer, it always opens to the Libraries folder. That's fine if you use Microsoft's default file organization, which designates Libraries as the overall container for your folders. But what if you don't? You might prefer to have Windows Explorer open to Computer or any other folder you choose. Here's how to do it:
1. Right-click the Windows Explorer icon on the taskbar (it's the one that looks like a folder), and then right-click the Windows Explorer icon from the context menu that appears and select Properties. The Windows Explorer Properties dialog box appears.
2. You'll have to edit the Target field on the Shortcut tab of this dialog box in order to change the default location at which Explorer opens.
If you want Explorer to open to a specific folder, simply enter the name of the folder, substituting your folder name for Folder, below, like this:
%windir%\explorer.exe c:\Folder
So to open Explorer to the folder named Budget, you would type this in the Target field:
%windir%\explorer.exe c:\Budget
If you want Explorer to open to special, pre-set locations, such as Computer, you'll need to enter special syntax in the Target field. Following is a list of three common locations and the syntax to use, followed by the syntax for the Libraries folder in case you ever want to revert to the default.
  • Computer: %windir%\explorer.exe ::{20D04FE0-3AEA-1069-A2D8-08002B30309D}
  • My Documents: %windir%\explorer.exe ::{450D8FBA-AD25-11D0-98A8-0800361B1103}
  • Network: %windir%\explorer.exe ::{208D2C60-3AEA-1069-A2D7-08002B30309D}
  • Libraries: %SystemRoot%\explorer.exe
3. After you've changed the Target field, click OK. Next time you launch Windows Explorer, it will open to the new location you've designated.

Protect the privacy of your Explorer searches


When you search through your PC from Windows Explorer, you can see the most recent searches that have been performed. If you share a PC and don't want others to see what you've searched for, you can turn off the recent searches feature:
1. In the Start menu's Search box, type GPEDIT.MSC and press Enter to launch the Group Policy Editor.
2. Go to User Configuration --> Administrative Templates --> Windows Components --> Windows Explorer.
3. Double-click "Turn off display of recent search entries in the Windows Explorer search box" and select Enabled from the screen that appears. Then click OK. The recent searches feature will now be turned off.

Open a command prompt at any folder


Command prompt fans will welcome this tip. With it, when you're in Windows Explorer, you can open a command prompt to any folder. This tip does exactly what the Windows XP PowerToy "Open Command Window Here" does.
To use it, hold down the Shift key and right-click a folder, then choose "Open command window here" from the context menu that appears. (Note that this tip doesn't work in the Documents folder.)

Use check boxes to select multiple files


In order to select multiple files for an operation such as copying, moving or deleting in Windows Explorer, you generally use the keyboard and the mouse, Ctrl-clicking every file you want to select. But if you're mouse-centric, there's a way to select multiple files in Windows 7 using only your mouse, via check boxes. To do it:
1. In Windows Explorer, click Organize, and then select "Folder and search options."
2. Click the View tab.
3. In Advanced Settings, scroll down and check the box next to "Use check boxes to select items." Click OK.
4. From now on, when you hover your mouse over a file in Windows Explorer, a check box will appear next to it; click it to select the file. Once a file is selected, the checked box remains next to it; if you uncheck it, the box will disappear when you move your mouse away.

Windows Explorer tips

Windows Explorer is the heart and soul of the Windows interface, and overall it works quite well. But you can make it better.

Add a Videos Link to the Start Menu


The Windows 7 Start Menu includes links to your Pictures and Music folders, but not to your Videos folder. If you watch a lot of videos and want a link to them on your Start Menu, here's what you can do:
1. Right-click the Start button and select Properties.
2. On the screen that appears, go to the Start Menu tab and click Customize.
3. In the dialog box that appears, scroll to the bottom, look for the Videos section, select "Display as a link," and click OK and then OK again.
If you'd prefer that Videos display as a menu, with links to files and submenus, instead select "Display as a menu."

Customize the Shut Down Button


The default action of the Start Menu's Shut down button is to turn off your PC. If you want to use the button for another action, such as restarting your PC, you click the arrow to the right of the Shut down button and select an action from the drop-down menu.
What if you rarely shut your PC down completely but frequently restart it? You can change the Shut down button's default action to be Restart -- or Switch user, Log off, Lock, Sleep or Hibernate.
To change your default, right-click the Start button and select Properties. On the Start Menu tab, click the "Power button action" drop-down menu and select which action you want to be the default. Then click OK, and OK again.

Search the Internet from the Start Menu


The Start Menu's search box is a convenient way to search through your PC -- but you can also have it do double-duty and perform Internet searches as well. To enable this feature:
1. In the Start Menu search box, type GPEDIT.MSC and press Enter to run the Group Policy Editor.
2. Go to User Configuration --> Administrative Templates --> Start Menu and Taskbar.
3. Double-click "Add Search Internet link to Start Menu," and from the screen that appears, select Enabled. Then click OK and close the Group Policy Editor. 
4. From now on, when you type a search term in the Search box on the Start Menu, a "Search the Internet" link will appear. Click the link to launch the search in your default browser with your default search engine.

Start Menu tips

Many people overlook the Start Menu, rarely using it except as a jumping off point to run an application or get to the Control Panel. But there's actually plenty you can do with it.

Get a Power Efficiency Report


Have a laptop and want to get more battery life out of it? Windows 7 includes a hidden built-in tool that will examine your laptop's energy use and make recommendations on how to improve it. To use it:
1. Run a command prompt as an administrator. To do this, type cmd in the search box, and when the cmd icon appears, right-click it and choose "Run as administrator."
2. At the command line, type in the following:
powercfg -energy -output \Folder\Energy_Report.html
where \Folder represents the folder where you want the report to be placed.
3. For about a minute, Windows 7 will examine the behavior of your laptop. It will then analyze it and create a report in HTML format in the folder you specified. Double-click the file, and you'll get a report -- follow its recommendations for ways to improve power performance.

Shake Your Desktop Free of Clutter


If you frequently run multiple programs simultaneously, your desktop can get extremely cluttered. This can get annoying if you're working on one program and want to minimize all the other windows -- in previous versions of Windows you had to minimize them individually.
With Windows 7's "shake" feature, though, you can minimize every window except the one in which you're currently working -- in a single step. Click and hold the title bar of the window you want to keep on the desktop; while still holding the title bar, shake it quickly back and forth until all of the other windows minimize to the taskbar. Then let go. To make them return, shake the title bar again.
You can accomplish the same thing by pressing the Window key-Home key combination -- although doing that is not nearly as much fun.